

All Outfits Horizon Zero Dawn
Tabular array of Contents
- Horizon: Zero Dawn - FAQ/Walkthrough
- Introduction
- Gameplay
- Controls
- Nuts
- Boxing Basics
- Video Walkthrough
- Walkthrough
- Principal Quests
- A Gift From the Past
- Lessons of the Wild
- The Point of the Spear
- Mother'south Center
- The Proving
- The Womb of the Mount
- A Seeker at the Gates, Part 1
- The War-Chief'southward Trail
- Revenge of the Nora
- A Seeker at the Gates, Part 2
- The Urban center of the Sun
- The Field of the Fallen
- Into the Badlands
- The Sun Shall Autumn
- Maker'south Cease
- The Grave-Hoard
- To Curse the Darkness
- Deep Secrets of the Globe
- The Terror of the Lord's day
- The Centre of the Nora
- The Mountain That Roughshod
- The Looming Shadow
- The Face of Extinction
- Side Quests
- In Her Mother'south Footsteps
- The Forgotten
- Ancient Armory
- Insult to Injury
- A Daughter'southward Vengeance
- A Moment's Peace
- Underequipped
- Death from the Skies
- Heap of Trouble
- Acquired Taste
- Blood on Stone
- Robbing the Rich
- Weapons of the Lodge
- Honor the Fallen
- Fatal Inheritance
- Sunstone Rock
- Hunters' Blind
- Dominicus and Shadow
- Redmaw
- Cause for Business concern - Bye
- Traitor's Bounty
- Queen's Gambit
- Errands
- Odd Grata
- Hunting for the Social club
- Sanctuary
- Luck of the Hunt
- Shortage of Supplies
- In Strange Lands
- To Old Associate
- Hammer and Steel
- Demand and Supply
- Deadliest Game
- A Curious Proposal
- Sun's Judgement
- Collateral
- Healer's Oath
- Bandit Camps
- Bandit Camp: Devil's Thirst
- Bandit Camp: Hollow Fort
- Bandit Camp: Ii-Teeth
- Bandit Camp: Gatelands
- Brigand Campsite: Blackwing Snag
- Bandit Army camp: Shattered Kiln
- Tallnecks
- Tallneck: Devil's Thirst
- Tallneck: Sunday-Steps
- Tallneck: Copper Deeps
- Tallneck: Spearshafts
- Tallneck: Rustwash
- Hunting Grounds
- Nora Hunting Grounds
- Valleymeet Hunting Grounds
- Greatrun Hunting Grounds
- Sun Furrows Hunting Grounds
- Spurflints Hunting Grounds
- Cauldrons
- Cauldron SIGMA
- Cauldron ZETA
- Cauldron RHO
- Cauldron 11
- Corrupted Zones
- Collectibles
- Vantage Points
- Ancient Vessels
- Metal Flowers
- Banuk Figures
- Datapoints
- Audio Datapoints
- Hologram Datapoints
- Text Datapoints - Quests
- Text Datapoints - Earth
- Text Datapoints - Machines
- Scanned Glyphs
- Appendix
- Skill Tree
- Consumable Items
- Weapons List
- Oufits List
- Crafting Recipes
- Automobile Data
- Automobile Categories & Sizes
- Condition Effects
- Damage Thresholds
- Components
- Car Catalogue
- Watcher & Redeye Watcher
- Strider
- Grazer
- Scrapper
- Broadhead
- Lancehorn
- Longleg
- Trampler
- Sawtooth
- Shell-Walker
- Fire Bellowback
- Freeze Bellowback
- Charger
- Stalker
- Glinthawk
- Corruptor
- Ravager
- Snapmaw
- Rockbreaker
- Behemoth
- Thunderjaw
- Stormbird
- Deathbringer
- Contact Data
- Version History
- Current Version
- Older Versions
- Copyright & Disclaimer
Horizon: Zero Dawn - FAQ/Walkthrough

| If you lot like this guide or think it is useful, please hit the |
|---|
| Note: If you lot want me to contact you back please leave your email address or GameFAQs ID. Comments with rude, crude, or harassment will be reported and removed. |
| Writer: Stephanie B. - krystalnexus [at] yahoo [dot] com |
Current Version: Ver one.01 - May viii, 2017
Introduction
Thank y'all for visiting my guide.
If yous find yourself on this guide, and so you're likely looking for help to consummate a sure task or find a sure detail. I spend hundreds of hours writing guides for fun, only my ultimate goal is to aid people get through these games with ease. I dearest it when I receive emails from people saying they were able to complete a game considering of my guide or merely take a question, and then please experience free to contact me via the e-mail in the Contact Data department of this guide.
My purpose for this guide is to aid you lot consummate Horizon: Zero Dawn with a 100% game experience via a step-by-step walkthrough. This means information technology will cover all Main Quests, Side Quests, and Errands while also providing information on where to obtain all Collectibles and Datapoints. I practise my best to brand these walkthroughs with as few spoilers as possible, so they have limited in-game event descriptions and are designed to guide you, not play the game for you lot.
If you lot desire me to add something or discover a mistake, please email me.
Donation Info
If you've found yourself using my guide and wish to back up my current and future walkthroughs, delight consider sending a one-fourth dimension donation to assist me continue to provide comprehensive guides for users similar you.
- Send a souvenir through Paypal or an Amazon Gift Card to krystalnexus(at)yahoo(dot)com

Experience free to likewise simply send your support via an email if you are unable to donate at this time.
Gameplay
Controls
| Control | Command |
|---|---|
| | Character Movement |
| | Camera Movement |
| | Up: Use Medical Pouch Left / Right: Switch Item Shortcut Down: Use Item |
| | Jump |
| | Roll |
| | Hunker / Slide |
| | Get together Materials / Search Carcass |
| | Weapon Bicycle |
| | Lite Assault Highlight Track (Focus Mode) |
| | Aim Weapon |
| | Heavy Attack / Fire Weapon (Aim Way) Tag Target (Focus Mode) |
| | - |
| | Focus |
| | Pause Menu |
| | Open Menu |
Basics
Horizon: Cipher Dawn does a expert job of explaining the basic game mechanics and features, only some mechanics are slightly subconscious or improperly explained in a what that helps you fully utilize them to their maximum potential. The post-obit department covers these gameplay features, every bit well every bit basic information that may be obvious to some players.
Health & Medicine Pouch
Survival against the machines is the most important component in Aloy'due south take chances, especially exterior the relative safety of All-Mother's Embrace. Aloy's health (HP) is indicated by the bar in the upper left of the HUD, which will be diminished when she receives damage from machines or other hazardous ecology effects, and if Aloy reaches cipher HP she will die.
There are two ways to restore Aloy's HP:
- The Medicine Pouch, indicated by the green bar below Aloy's health, tin can be filled past gathering diverse herbs and will gradually restore HP
- Health Potions, which can be crafted and institute, instantly heals a set amount of HP
In addition, if Aloy is damaged below 25% HP she'll automatically regenerate HP until she returns to 25%, provided she can avoid damaged long enough for the ability to kick in.
Difficulty
At the offset of the game you'll exist prompted to choose a difficulty setting to make up one's mind what level of claiming you want for Aloy's journey. This setting modifies the impairment dealt to Aloy, besides as the harm she does to machines, but does not touch on driblet rates or the corporeality of experienced gained.
| Difficulty | Dmg. to Enemies | Dmg. to Aloy |
|---|---|---|
| Easy | 125% | 50% |
| Normal | 100% | 100% |
| Hard | 90% | 125% |
| Very Hard | 80% | 150% |
Level Progression
Aloy's capabilities are based on her electric current level, which starts at level 1 and can exist increased by gaining experience through combat or completing quests. With each level increase, Aloy gains a 10 health (HP) increase and a single Skill Point.
Skills
Equally Aloy gains levels and completes main quests and some side quests, she'll proceeds Skill Points that can be used to purchase abilities. While some abilities are passive, increasing the size of your Medicine Pouch or increasing the corporeality of time a motorcar volition remain overridden, quite a few increase Aloy's combat abilities past allowing her to perform special attacks or increasing the number of arrows that she tin nock on her bow at one time.
The Focus
The almost important tool in the game, the Focus can be used for anything from scanning Datapoints to analyzing and highlighting subconscious information in the world. While primarily used to scan the machines to learn their weak points, the Focus can also be used to tag enemy paths or locate tracks left by individuals. To activate, press R3 to bring up the scan reticule and target a auto, beast, Datapoint or other object for more information. While active, Aloy's movements slow to a crawl and disable the ability to access the Weapon Wheel or Items.
Navigation & Objectives
Horizon: Zero Dawn works on a "mission" or quest based progression, meaning that you'll always take an objective. Whether you're focusing on the Master Quests or optional content, the goal and next objective for each quest is clearly listed in the Quest tab of the Primary Menu. The result of this system is that when a quest is set to the current active quest, via the Main Menu, the game will automatically place waypoint markers on the map to signal the location of the next objective. These waypoint markers can be seen past opening up the Map in the Main Menu or via the compass at the top of the HUD.
Campfires & Fast Travel
As you explore the world, you'll automatically activate campfires when Aloy approaches them. While important, due to the fact that they allow you lot to save your game progression, campfires also become Fast Travel points. To Fast Travel, bring up the Map in the Master Menu as select any activated campfire (marked in green) and printing ![]() to Fast Travel to its location. Note that yous must have at to the lowest degree 1 Fast Travel Pack in your inventory.
to Fast Travel to its location. Note that yous must have at to the lowest degree 1 Fast Travel Pack in your inventory.
Inventory & Chapters Upgrades
Every weapon, outfit, modification, resource, and consumable item you find or craft in the game is carried in Aloy's inventory. Unlike many games, Horizon has an inventory management system that allots a certain number of spaces bachelor for each category of item, such as Resources. Once these allotted spaces are full, Aloy will be unable to collect additional items of that category until you make more infinite by dropping items, selling items at a Merchant, or consuming them.
While inventory is limited, you can craft capacity upgrades for each of Aloy's bags by visiting the Crafting tab in the Main Carte. Each upgrade requires a sure number of resources of varying types, such as creature skins and Metal Shards, simply will aggrandize the maximum number of items within the given category that Aloy tin carry.
See Carry Chapters in the Crafting Recipes section for more than information
Crafting
Mastering the Crafting system is essential for survival in the wilds and allows Aloy to utilise Resources to create consumable items and ammunition, modify weapons and outfits, and increase her inventory capacity. All Crafting Recipes and chapters upgrade require a set number of dissimilar Resources, and Metallic Shards, to create and can exist accessed via the Crafting tab in the Master Carte. Note that ammunition can be crafted on the fly from the Weapon Bike and modifying weapons and equipment does non crave anything, except a modification slot and modification node.
Supply Caches & Treasure Boxes
Resources are essential for keeping Aloy armed with plenty of ammo and supplies, only resources can be found in more locations than simply annexation machine carcasses. Supply Caches are loot containers placed throughout the earth, often in towns and brigand camps, that contain a random set of items and resources in larger quantities than found on machines. Make sure to keep an eye out for these i-time only containers, every bit they can stock up Aloy when she runs low on supplies.
Treasure Boxes, like Supply Caches, are loot containers that contain a random set of items based on the type of treasure box they area. Different Supply Caches, Treasure Boxes are stored in the Inventory > Treasure Boxes tab of the Main Card and tin be opened at any time to retrieve the contents within. These special boxes can be obtained by defeating enemies, completing quests, or purchased at Merchants.
Collectibles & Datapoints
There are four types of collectibles in the game: Vantage Points, Ancient Vessels, Metal Flowers, and Banuk Figures. While collecting these items offers very piddling, in terms of rewards or benefits, they do give you lot additional story information and tin be traded in when yous accomplish the Carja majuscule of Meridian for treasure boxes.
Datapoints are Horizon'south version of backstory and exposition, via data logs that tin can exist establish throughout the world. While in that location is no trophy or reward for collecting Datapoints, they offering the most in-depth information on the events of the by.
Battle Nuts
The majority of Horizon: Nil Dawn's gameplay revolves around gainsay against machines. While the game does offering some bones combat information and tutorials on how to use each weapon, the following will focus on roofing any information that players may detect lacking inside the game.
Melee Attacks
The but close-range weapons in Horizon are Aloy'southward makeshift Spear, which is gained at the start of the game, and the upgraded Lance, gained much later. Both weapons are limited to light attacks (![]() ) and heavy attacks (
) and heavy attacks (![]() ), only special attacks like Silent Strike and Critical Striking can be purchased from the Skill tree to increase the multifariousness of attacks.
), only special attacks like Silent Strike and Critical Striking can be purchased from the Skill tree to increase the multifariousness of attacks.
Ranged Attacks
The majority of Aloy's attacks are mid to long-range attacks, using a varied of bows and slings, and are the centre of Horizon's combat arrangement. Each weapon type, such every bit Hunter Bow or Sharpshot Bow, has a unique fix of arrows and upgraded versions of each bow, such as the Carja or Shadow, will increase the type of arrows each bow type can shoot. While bows are primarily used for damage, through Hunter Arrows and Precision Arrows, some arrows focus less on damage and more on tearing machine components off enemies. In addition, the War Bow adds elemental arrows that can be used to create status effects on enemies.
In addition to bows, Aloy can apply slings and a Rattler to vary your combat manner based on the needs of each encounter. Unlike bows, slings lob projectiles in an arcing style and have a slower charge per unit of burn, typically made up for past increased power. There are two types of slings: the basic sling that fires elemental bombs that can exist used to create status effects on enemies, similar the War Bow, and Blast Slings, which fire damaged explosive grenades. The Rattler, on the other manus, is a rapid fire, low harm, weapon that fires burst of bolts, similar to an automatic crossbow.
Weapon Wheel
Aloy can equip upwardly to four weapons at a time, in addition to the Spear/Lance, via the Inventory tab in the Main Menu. Once equipped, Aloy tin can switch between the weapons on the wing by holding ![]() to select the weapon of your selection, allowing you lot to mix upwardly your strategy no affair the situation. In addition, the Weapon Bicycle can be used to craft ammunition on the fly by simply hovering over the ammo blazon and holding
to select the weapon of your selection, allowing you lot to mix upwardly your strategy no affair the situation. In addition, the Weapon Bicycle can be used to craft ammunition on the fly by simply hovering over the ammo blazon and holding ![]() .
.
Tripwires & Traps
Placing tripwires and traps in advance, earlier engaging in gainsay, in the path of the machines can requite you a leg up in boxing. The Tripcaster, introduced through the early campaign, allows Aloy to burn down two pivots into the ground to create a tripwire between the two points. While the Tripcaster only starts with a Shock Wires, upgraded versions will grant you lot access to more useful versions such equally Nail Wires.
There are also three types of consumable traps: Blast Traps, which deals damage when it explodes (proximity), Detonating Nail Traps, which deals damage when information technology explode (contact or destroyed), and Shock Traps, which daze enemies when it explodes (proximity).
Damage Types
While straight damage is the master way to defeat enemies in Horizon, some weapons offer additional effects that are highly valuable.
| Type | Effect (Machine) | Issue (Human being) |
|---|---|---|
| Damage | Reduces HP with no secondary consequence | |
| Tear | Deals no damage, but tears/explodes certain components and armor | Knockdown |
| Fire | Fire build-up that deals damage over time when inflicted | |
| Shock | Stuns and downs enemies, opening them up to Critical Strikes | |
| Freeze | Slows movement and increase "Harm" up to 200% | Slows motility and increases "Damage" upwardly to 50% |
| Corruption | Enemies become hostile to all units, including allies* | |
*Annotation that Corrupted machines tin can non exist corrupted by arrows to assault each other.
Modifications
Modifications are special items that can exist equipped to Aloy's weapons and outfits to increase their abilities for offensive or defensive ways. Modifications come up in 3 varieties: Common, Rare, and Very Rare.
Nearly weapons allow y'all to equip a number of different types of modifications (Fire, Freeze, Tear, Handling, etc) based on the weapons abilities and ammunition types. While equipping a weapon with the get-go modification you get may seem similar a skillful idea, choosing mods that arrange your gameplay style and ammo usage should be considered when placing mods in each weapon. For instance, if you rarely use Shock Arrows vs. Freeze Arrows, you'll likely desire to equip the War Bow with Freeze mods over Shock mods.
Note that you will be unable to un-equip modification from your weapons and outfits until you buy the "Tinker" skill, just modifications can be overwritten with another mod.
Car Armor & Evolution
In order to protect themselves, machines have armor plates over their bodies and absorb 90% of the damage dealt and sometimes protect their weak points. These armor plates have their own HP and trigger-happy threshold, so removing them is essential for defeating difficult and unsafe enemies. That being said, elemental attacks such as Fire and Freeze will have full potency, even when striking an armor plate.
Since machines are constantly in the production, which is explained throughout the story, they tin evolve to better protect themselves. This development occurs subsequently defeating enough machines of the same blazon, such as 15 Striders, and results in additional armor plates appearing on the evolved variant.
Overriding Machines
At a certain point in the game, Aloy will gain the ability to override and command machines. This will permit Aloy to "recruit" powerful machines to fight alongside her in gainsay and sometimes ride them as mounts to travel quickly across terrain. To override a car y'all'll need to arroyo a machine without entering combat and press and concur ![]() to hack into the machine until the Override Estimate completely fills. Note that Aloy volition only be able to override a limited number of machines when she gains this power, just tin expand her capabilities by completing Cauldrons.
to hack into the machine until the Override Estimate completely fills. Note that Aloy volition only be able to override a limited number of machines when she gains this power, just tin expand her capabilities by completing Cauldrons.
One time overridden, machines will remain allied to Aloy for a sure amount of time, though this can be extended or removed through Skills, and gain a benefaction to their defensive and offensive capabilities. This means that overridden machines make great allies in difficult situations, but be wary of attacking overridden machines as information technology will reduce the time remaining in Aloy'south control (even if prepare to indefinitely through Skills).
Corrupted Machines
Corrupted machines are constitute in special zones, known as Corrupted Zones, where they patrol in an agile alert status. Stronger than their not-corrupt counterparts, corrupted machines are highly aggressive and weak to Fire. In addition, corrupted machines are immune to being overridden or abuse past Aloy and merely appear within their zones or through story events.
Video Walkthrough
Note that I volition exist doing a whole Video Playthrough of this, identical to the text here, which you can watch here:
- https://world wide web.youtube.com/playlist?list=PLVBHCZXojrJdQfpkH10lUeSNdP7SF0Tbw
Walkthrough
After selecting the language of your selection, enjoy the beautiful opening cutscene, in which Rost takes a baby Aloy to the peak of the Sacred Mount for her naming ritual.
Principal Quests
A Souvenir From the By
Unlock: Automated
Later experience being shunned past a woman in the hamlet, Aloy runs off in acrimony and accidentally falls into a cave to automatically begin this quest.
 After the cutscene, have either of the tunnels to a small gap below some stalactite and printing
 ![]() to crouch through the opening. Head left downwards the metal stairs and through a partially open doorway and and so continue straight through the side by side room to a stairwell. Head up the stairs and follow the path until you drib into a new room with a corpse for a scene, in which Aloy volition gain her Focus. This piece of technology is going to be extremely of import as you lot progress through the game, every bit it allows Aloy to access machines and see things that others would overlook.
to crouch through the opening. Head left downwards the metal stairs and through a partially open doorway and and so continue straight through the side by side room to a stairwell. Head up the stairs and follow the path until you drib into a new room with a corpse for a scene, in which Aloy volition gain her Focus. This piece of technology is going to be extremely of import as you lot progress through the game, every bit it allows Aloy to access machines and see things that others would overlook.
Toggle Aloy's Focus off by pressing ![]() and head upward the stairs to the waypoint, on the closed door, and and then press
and head upward the stairs to the waypoint, on the closed door, and and then press ![]() again. Expect right and follow the pipes back to their source in the nearby room then circle effectually the room to observe an entrance. Inside, use your Focus to browse the Lawmaking Nexus and Holo Lock and and then match the two circles by rotating the red section until information technology is at the lesser to unlock the door.
again. Expect right and follow the pipes back to their source in the nearby room then circle effectually the room to observe an entrance. Inside, use your Focus to browse the Lawmaking Nexus and Holo Lock and and then match the two circles by rotating the red section until information technology is at the lesser to unlock the door.
Render to the door and examine information technology to open the doorway and then head straight toward the stalactite and stalagmites straight alee. On the brightly lit auto to the left you lot should meet a circle with a hexagon within it, which indicates Datapoints. Activate your Focus and scan the device beneath the circle to unlock the Audio Datapoint - For Director Evans [08/63], which you lot can play now or afterwards through your Master Menu. Go on down the nearby stairwell until Aloy notices another torso and scan it for a scene that unlocks the Hologram Datapoint - Happy Birthday Isaac! [01/22] and then squeeze through the door at the back of the expanse.
Head right after passing through the door to a side room with the Audio Datapoint - Log: Connor Chasson [06/63] on the desk and Audio Datapoint - Full Stop [07/63] on a corpse and then backtrack and go along. Head up another stairwell to reach the customs room and make sure to check each of the bodies for:
- Sound Datapoint - Log: Connor Chassen [01/63]
- Sound Datapoint - Log: Skylar Rivera [02/63]
- Audio Datapoint - Log: Jackson Frye [04/63]
- Audio Datapoint - Log: Ella Pontes [03/63]
- Audio Datapoint - Log: Mia Sayied [05/63]
You lot tin can now follow the linear path to reach the exit of the cave, where Rost volition help pull yous out for a scene.
Lessons of the Wild
Unlock: After completing A Gift From the By
After completing the previous quest, Rost will accept Aloy out to learn how to survive in the wilds of the Embrace.
 Follow Rost to the nearby constitute, marked with a triangle with a leafage within information technology, and press
 ![]() to gather the salvebrush and so press Upwards on the
to gather the salvebrush and so press Upwards on the ![]() to employ the medicine. The amount of health, indicated by the orange bar in the upper left of the screen, that you lot'll gain when you apply the Medicine Pouch depends on the amount of medicine stocked upward, indicated by the greenish bar below the wellness bar.
to employ the medicine. The amount of health, indicated by the orange bar in the upper left of the screen, that you lot'll gain when you apply the Medicine Pouch depends on the amount of medicine stocked upward, indicated by the greenish bar below the wellness bar.
Continue to follow Rost until he stops and crouches and then press ![]() to hunker and follow him into the tall grass. Afterward the scene, wait for the Watcher to pass before crossing to the opposite side of the path and then look for some other Watcher to pass before following Rost to another patch of tall grass. Wait for the terminal Watcher to pass earlier you go on to follow Rost for another scene with one of the Nora tribe members, Teb, and so go on to follow Rost. After Rost scares off the herd of Striders, get together three rocks on the side of the road, marked with the same icon as the salvebrush, and then keep to follow Rost for some other scene.
to hunker and follow him into the tall grass. Afterward the scene, wait for the Watcher to pass before crossing to the opposite side of the path and then look for some other Watcher to pass before following Rost to another patch of tall grass. Wait for the terminal Watcher to pass earlier you go on to follow Rost for another scene with one of the Nora tribe members, Teb, and so go on to follow Rost. After Rost scares off the herd of Striders, get together three rocks on the side of the road, marked with the same icon as the salvebrush, and then keep to follow Rost for some other scene.
The objective is to lure the Watcher toward Rost to enable him to kill the motorcar by property Down on the ![]() to aim the rock near Rost and and then releasing it to throw the rock. With the Watcher expressionless, head downwards to Rost'due south position and concord
to aim the rock near Rost and and then releasing it to throw the rock. With the Watcher expressionless, head downwards to Rost'due south position and concord ![]() near the body of the Watcher to loot it and then gather some ridge-woods from the nearby tree stocks for the materials to craft arrows. Yous can now concord
near the body of the Watcher to loot it and then gather some ridge-woods from the nearby tree stocks for the materials to craft arrows. Yous can now concord ![]() to open the Weapon Bicycle, brand certain you're selecting the Hunter Arrow Pack with the
to open the Weapon Bicycle, brand certain you're selecting the Hunter Arrow Pack with the ![]() , and then concord
, and then concord ![]() to craft 20 arrows. Follow Rost into the alpine grass for a scene and and then utilize your Focus to scan the Strider to highlight the canister on the back.
to craft 20 arrows. Follow Rost into the alpine grass for a scene and and then utilize your Focus to scan the Strider to highlight the canister on the back.
It's a good idea to scan whatsoever new machine and press the
for an in-depth view in Aloy'south Notebook. This will non but show y'all each of the weak points on a machine, only note the blazon of weakness that part has - such every bit Tear, Fire, Ice, etc.
Follow the instructions to aim your bow at the centre or canister on the Strider then hold ![]() to draw the bow and burn. Make certain you lot depict the bow back enough that the pointer will fly straight enough and far enough to blow the canister off the Strider'due south back and and so continue to fire arrows at the Strider until it goes downward. Yous can now loot the canister, if information technology flew off the Strider, and the Strider's carcass and and then follow Rost for a scene.
to draw the bow and burn. Make certain you lot depict the bow back enough that the pointer will fly straight enough and far enough to blow the canister off the Strider'due south back and and so continue to fire arrows at the Strider until it goes downward. Yous can now loot the canister, if information technology flew off the Strider, and the Strider's carcass and and then follow Rost for a scene.
 The objective is to attain Teb on the other side of the clearing without existence spotted by the numerous Watchers and Striders. The good news is that the Striders will remain grazing the whole time, meaning they won't spot yous unless you walk right upwards to their face. That being said, you lot'll need to stay in the tall grass to avoid beingness spotted past the Watchers, while moving from each patch of tall grass to achieve Teb.
Browse the nearest Watcher and press ![]() to highlight the Watcher'south path and then cross to the side by side patch of alpine grass one time the Watcher passes. Make sure to allow the Watchers to finish walking and begin to scan the area earlier you cross, as y'all tin exist spotted if you lot rush to get across the path when they are already stationary. Echo this process to reach Teb for a scene then make your way through the alpine grass, toward the waypoint, avoiding i more Watcher to reach Rost for some other scene.
to highlight the Watcher'south path and then cross to the side by side patch of alpine grass one time the Watcher passes. Make sure to allow the Watchers to finish walking and begin to scan the area earlier you cross, as y'all tin exist spotted if you lot rush to get across the path when they are already stationary. Echo this process to reach Teb for a scene then make your way through the alpine grass, toward the waypoint, avoiding i more Watcher to reach Rost for some other scene.
Flashpoint are decision-making events that allows you to choose how Aloy will react to a situation, simply they don't affect the story.
The Bespeak of the Spear
Unlock: After completing Lessons of the Wild
After the cutscene, note the Grazer-similar grooming dummies around Rost'due south home. At that place are a total of 23 preparation dummies in the Nora Country, the Embrace and the Sacred Lands, that tin be knocked over with as single heavy attack to unlock the Trophy: Downed 23 Grazer dummies. You'll also want to visit the bivouac nearby to perform a Quick Save or Transmission Save, allowing you to choose how much command over your progress, too as creating a Fast Travel point.
The game will Car Save after nearly events, but information technology's always skilful to have other "controlled" saves in case you need to load a back-up file. The game will store up to 5 Auto Saves and Quick Saves, while you lot can make as many Manual Saves as you wish.
Earlier heading anywhere, open up the Main Menu and go to the Skills tab to admission the Skill Tree. While all skills will help Aloy as she wanders through All-Mother'due south land and beyond, at that place are some skills that volition make your life much easier.
- Silent Strike allows you to one-shot unaware machines instead of making every encounter a fight
- Concentration allows you lot to zoom in and slow down time by pressing R3 while aiming
- Lure Call allows you to telephone call machines to your location in tall grass, followed past a Silent Strike

Brand your way down the mountain toward the waypoint to spot Rost on the cliff then climb up the wall to speak with him. You lot can choose how much information yous learn from NPCs when you lot speak with them by selecting the options without the "waypoint" icon side by side to them to gain additional insight. After the scene, jump onto the zipline to go out Rost behind and explore the Embrace.
The animals in the globe aren't just for show! Killing an animal and looting it's carcass sometimes grants y'all a Bone or Skin for that type of creature, which can be used for Crafting capacity upgrades for your gear.
At this point you'll be able to obtain and complete the post-obit:
- Side Quests - The Forgotten and In Her Mother'south Footsteps
- Errands - Odd Grata
Completing the optional quests will grant yous experience and Skill Points, which volition make the Primary Quests much easier to complete.
 Karst is located to the southeast of Mother's Cradle, between the town and the Southern Embrace Gate. In society to purchase the Tripcaster you'll need to obtain a Scrapper Lens by defeating Scrappers, so make sure yous have one on y'all before speaking with him.
In add-on to the Tripcaster, yous should at least purchase the Sharpshot Bow, every bit it'due south Precision Arrows do significantly more damage than your standard Hunter Arrows. The bones State of war Bow is pretty useless, every bit the Tripcaster already has Stupor Wires, though you might want to purchase the Ropecaster to tether machines to the footing.
Every NEW merchant you run into offers a Free Sample Box, which you should always purchase.
If your did the additional quests you've likely collected plenty of Blaze from Striders and Metallic Shards from other machines to craft Fire Arrows, then make certain to craft the maximum number you're able to hold and and so head to the Northern Embrace Gate and speak with Rost. Afterward discussing any additional dialogue with Rost, rest at the campfire for a scene to leave the Embrace.
Once outside the Embrace, follow the road and kill the Watcher on the mode and then proceed onto a rock for another scene. Afterwards, drop to the ground and head into the tall grass on the other side of the road and then browse the Sawtooth and mark it's path. Wait for the Sawtooth to caput to the other side of the surface area and so place Daze Wires forth the path, making to identify them at decent intervals along the path. The reason yous want to identify multiple wires, despite the fact that a single Shock Wire is enough to stun a Sawtooth, is that the Sawtooth can spring over wires during its attacks.
This is a adept place to make the Tutorial: Tripcaster your active quest, since tutorials must be active to complete.
Wait for the Sawtooth to circle effectually and striking your first Shock Wire, which should stun it, so pump information technology total of Burn Arrows until the Fire icon over the Sawtooth'south head is full and a white circle appears around the icon, which means that the Sawtooth is burning and will receive fire harm over time. While the Sawtooth is down yous can also aim a Fire Pointer at the Bonfire canister on it'south belly to blow up the canister and do massive damage, as well as calculation the Fire effect.
Once the Sawtooth is expressionless, loot the carcass of the machine for a scene with Rost to complete this quest.
Reward Boxes can be opened by going your Inventory in the Main Carte and selecting Treasure Boxes.
Mother's Eye
Unlock: After completing The Point of the Spear
 Brand your way to the northern function of the Embrace to find Rost near the bridge leading to Mother's Heart and speak with him. After a heartfelt good day, head to the entrance to Female parent'due south Heart for a scene to enter the village.
At that place isn't much to do in Mother'south Center, every bit near people are enjoying the festivities, so follow the path right to notice the "quondam friend" Teersa was speaking well-nigh. Teb volition offer Aloy the Nora Brave for costless, which you can purchase from his shop, and not far up the route you'll as well find Karst. At that place are a few places you lot can sit down to enjoy the festivities, marked with a hand icon, but the only one worth visiting is the one with the elder telling the story of All-Mother and the Metal Devil.
When you're ready to continue, head upward the hill for a scene with the Carja and then speak with the man nearby wearing a Focus for another scene. You can and so speak with Erend, who joins the conversation one time Olin leaves, for more information on the Sun Rex and the Red Raids. Later you're done speaking with Erend, caput down the hill toward the Blessing Ceremony to meet up with Teersa again for another scene.
Afterwards the anniversary, speak with Olin to face up him about his behavior and and so head to the Hunter's Society for some other scene. Confront Bast, the boy who threw a rock at Aloy when she was a child, and and then talk to Vala for additional dialogue before laying downward to rest.
The Proving
Unlock: After completing Mother'due south Heart
 After the cutcene in which the Nora hopefuls climb the icy mount you'll need to take down a Grazer to obtain a Proving Trophy. Set down a Stupor Wire along the Grazer's path to stun at least one Grazer and finish it with a Critical Strike and then loot the bays. After another scene, rapidly stop off some other Grazer to obtain a second trophy so caput uphill to the Brave Trail.
Climb up the path until you trigger a scene with the Proctor to start along a different path and so take the zipline. Cantankerous the overturned tree and jump up to grab onto a ledge and and so head direct up until you return to your feet. Hop onto some other ledge direct ahead and make your way correct along the cliffside to solid basis and and so caput downwards some other overturned tree to rappel off the right side of the cliff. Follow the path up another cliff wall and over the remains of a machine and so climb up i more cliff wall and cross an overturned tree to achieve the zipline to the finish line.
After the cutscene, head to the right of the attackers to observe a ledge that you lot can climb up and and so sneak around and Silent Strike the archers. Don't be afraid to boodle the bodies of the attackers for items unique to human enemies and Health Potions before you cease off the last enemy to trigger a scene. Yous'll be teleported back down to Vala'south location, so make your style to the same ledge to assail the archers once again while watching out for the melee units.
After defeating the second wave, another scene will trigger and you'll be up against a new enemy with a Deathbringer Gun. Keep the rocks between yourself and the gunman until you lot finish off any melee units that blitz Aloy and then striking the gunman with Burn down Arrows while making certain you fight him away from the archers to avoid as much damage as possible. Utilize heavy attacks to stun the gunman and terminate him off and and so choice upwards his gun to finish off the archers for a scene.
The Womb of the Mount
Unlock: Later completing The Proving
 After the cutscene, caput out of the room and right to observe Aloy'due south clothes and Focus so head through the two doors nearby. In the next surface area, plough right to a locked door and crawl through the nearby vent to observe a Power Jail cell - used for the Ancient Armory quest - and and then backtrack and cross to the opposite room to find Aloy's gear and the other Focus for another scene. You tin can now follow Teersa through the mountain until she stops and and then speak with her for some other scene to learn near Aloy'south birth.
Follow Teersa out of the mountain for some other scene and then head down the path to the village and speak with Teb for some additional information. Once you're ready, climb the nearby ladder to speak with Resh about the Proving to trigger a scene.
You'll want to set downward Shock Wires near the gate entrance as presently as the cutscenes ends, which should stun the Striders as they bosom through the gate doors. Use Precision Arrows to finish off the downed Striders while making sure to keep your altitude from the Corrupter when it enters the village and then move around to avert being cornered by the Corrupter. Try and draw the Corrupter away from the remaining Striders and so rush over and knock the Striders over with a heavy assault and finish them with a Critical Strike.
One time the Corrupter is the only enemy left, browse it to acquire its weak bespeak and so use Precision Arrows on the Grenade Launcher and Fasten Launcher. Make sure to keep moving around the village to stay at a altitude from the Corrupter, while watching out for the leap attack that can launch it quite a distance, and utilise Concentration to go far disquisitional strikes on its weak points. Once the Corrupter is down, loot the carcass for the part that allows it to accept over other machines.
At this point you'll be able to leave the Comprehend to search outside its borders. This opens up the majority of the Sacred Lands for exploration and will unlock a number of quests. How you tackle the mixture of Main Quests, Side Quests, and Collectibles is completely up to you lot.
Before leaving the Embrace, return to Mother'southward Heart and purchase the maps to make all Collectibles on your map.
Optional Exploration
Return to Rost's home and examine the grave outside the gates for some additional dialogue and collect the Metal Flowers - Mark I (B) on the cliffside nearby and and then render to the ruins that Aloy cruel into every bit a child for the Metal Flowers - Mark I (A) and a Ability Cell for the Ancient Armory quest. You can also speak with Enara in Mother's Center to begin the Side Quest - Insult to Injury.
A Seeker at the Gates, Function 1
Unlock: After completing The Womb of the Mountain
Caput to the Strider site in the heart of the Embrace and hide in the tall grass and so call over one of the Strider'southward with Lure Call. Once the Strider reaches Aloy, press and hold ![]() to hack the automobile. Hacking machines will let you lot to accept them fight equally allies and sometimes allow Aloy to ride them equally mounts.
to hack the automobile. Hacking machines will let you lot to accept them fight equally allies and sometimes allow Aloy to ride them equally mounts.
Ride the Strider to the Main Encompass Gate and laissez passer through the gate for a scene and then speak with Varl to have the Main Quest - The War Master's Trail.
Optional Exploration
You lot now accept access to the whole of The Sacred Lands and the following quests:
- Side Quests - Ancient Arsenal, Insult to Injury, A Daughter's Vengeance, A Moment's Peace, and Underequipped
- Errands - Hunting for the Lodge, Sanctuary, and Luck of the Hunt
While you won't be able to consummate the Aboriginal Armory or Hunting for the Lodge until y'all have access to the Sundom, yous tin can begin them in The Sacred Lands to add them to your queue. In addition, by starting Hunting for the Lodge you'll accept access to the start of the Hunting Grounds, which reward a lot of experience.
Activities
- Tallneck: Devil'south Thirst
- Brigand Camp: Devil's Thirst, Brigand Army camp: Hollow Fort, and Bandit Camp: 2-Teeth
- Nora Hunting Grounds & Valleymeet Hunting Grounds
- Cauldron SIGMA
Collectibles:
- Vantage Points - Air Combat Academy, Colorado Springs, Explorer Museum, Denver Stadium, Sterling-Malkeet Amphitheater, and Bridal Veil Falls
- Metal Flowers - Marking I (C), Mark I (D), Mark I (E), Marker I (F), Mark I (Chiliad), Mark I (H), Marking I (I), Marker I (J), Mark 2 (B), Marker Three (C)
- Aboriginal Vessels - Arches, DroneHop, Wayfarers, Miriam, USRC, KZ
- Banuk Figures - My Claim, I Name You, Penalty
The War-Principal'due south Trail
Unlock: After completing A Seeker at the Gates, Part 1
Head to the massacre site to the north of Female parent's Rise and examine the Corrupter and so activate Aloy's Focus and scan the expanse before examining a Watcher carcass. You lot tin can now talk to the survivor that arrives for a scene and make your way southeast of the Tallneck in Devil'south Thirst to detect the abandoned campsite. Actuate Aloy's Focus and scan the bow, campfire, bandage, and arrowheads and and then examine each for additional dialogue before following the tracks for a scene. a scene.
Later on coming together up with Sona, follow her to a nearby encampment with cultist and corrupt machines and then quietly approach the encampment. You can use the tall grass on the upper level of the encampment to eliminate the majority of the cultists and corrupted Watchers, merely it seems that the Nora will somewhen bring together the fight and stealth becomes less of an option.
In one case you lot've clear the encampment, speak with Sona for a scene and and so use Aloy's Focus to find some tracks that lead to datapoint. You tin can now return to Sona and Varl to inform them of the location of the remaining cultists to consummate this quest.
Revenge of the Nora
Unlock: After completing The War-Chief's Trail
Head to Red Echoes to the n of Mother'due south Crown and rest at the bivouac for a scene to run into up with Sona and the other Nora. There are three encampments in Devil's Grief that you'll need to clear, each with an alert and a number of cultists:
 The starting time camp is directly east of the campfire and has a Corrupted Watchers patrolling outside the ruins. Head to the right (s) side of the ruins and climb up the rubble to sneak in the back of the encampment and so quietly take out the cultist nearly the alarm before disabling it. You tin now finish off the remainder of the cultists and another Watcher fairly easily.
The second campsite is to the southeast of the first i and is on a structure built over some h2o. Due to the water and open infinite information technology'southward hard to sneak effectually in this expanse and the alert bell is directly in the center of the area. Stay on the outskirts of the area and defeat the cultists with Burn Arrows while trying to stay undetected. If you are spotted, make sure you can see the alarm and kill whatever cultist that heads toward information technology to phone call in reinforcements.
The 3rd campsite is to the n of the previous army camp or northeast of the start camp and has a number of cultists. Sneak through the tall grass to the partially destroyed stone wall on the south side of the camp and then shoot a Fire Arrow into the Blaze on the stationary cultists back to explode it. This should disorient the other cultists and allow you sneak up on any of the cultists that investigate.
Once you've cleared all three camps, head to the tallest tower in Devil'due south Grief to speak with Sona and Varl and then follow Varl to the Ring of Metal. Speak with Varl to enter the Ring of Metallic and and then follow the upper level until you accomplish the end, above 2 cultists. Equally Varl instructs, stand over the one on the correct and perform a Strike From In a higher place, if you have the skill purchased, and Varl will take out the other cultist. Use Aloy's Focus to spot the next group of cultists and enter the tall grass behind the one on the left and then kill him once Varl is in location to driblet downwards on the other. Follow Varl to a final group of cultists and head through the tall grass to have the 1 on the left and then climb over the rubble nearby for a scene.
Slide down the hill and enter the tall grass when the Bellowback nearby turns away and so lure the cultist in the trench to your location to kill him. Another cultist should head down the walkway above the trench, toward the Bellowback, and so lure him over to kill him off and then follow the trench while crouching to avoid making any dissonance. On the other side of the trench, brand sure the Watcher to the left is on the far side of its path before standing directly into some more alpine grass and so utilise a Fire Arrow to calorie-free the Bonfire inside the hut for a scene.
Once the Nora join the fight you'll need to take out the cultists and machines to complete this quest. Focus your attention on any Watchers while you aim Precision Arrows at the light-green sacs on the back and gullet of the Bellowback. Once you do enough impairment to ane of the sacs the fire inside volition ignite and explode, doing significant damage to the Bellowback and whatever cultists nearby.
Sona will head to Mother's Crown, where you can speak with her for the Errand - Shortage of Supplies.
A Seeker at the Gates, Part 2
Unlock: N/A
Caput to Female parent'due south Crown in the Sacred Lands and speak with Marea to learn of the fort, Daytower, that sits between the Nora lands and the Carja capital of Pinnacle.
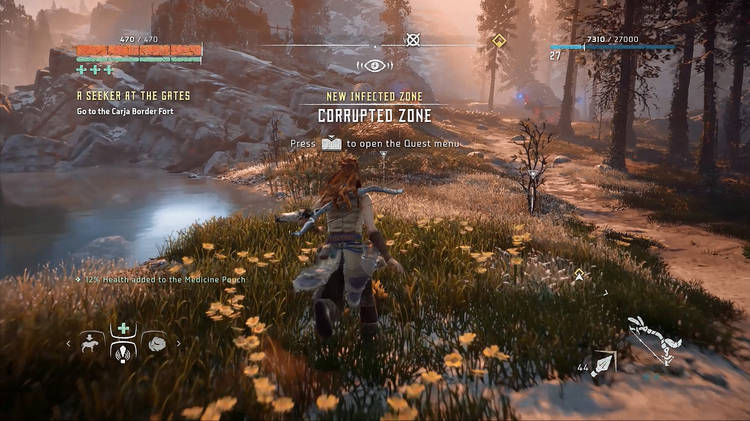 In order to gain access to the fort you'll first need to clear out ii Corrupted Zones in the Sacred Land. Corrupted Zones are areas of the map where you'll encounter corrupted version of the machines, which have higher HP and do Abuse damage through the red liquid that they ooze.
The start Corrupted Zone that you may have run beyond was located simply southeast of the Main Embrace Gate, most the Air Gainsay University Vantage Bespeak. If you've already cleared this area you'll showtime this portion of the quest with a i/ii cleared and will but have to articulate ane of the other four Corrupted Zones in the Sacred Lands.
Once you've cleared the required Corrupted Zones, head to the western border of the Sacred Lands to Daytower. The gate is under assault by a Corrupter, Scrapper, and Watcher that you'll need to articulate out before you can approach the gate commander to gain access to Daytower and complete this quest.
Optional Exploration
You at present have access to the whole of The Carja Sundom and the residue of the quests and activities. While you tin caput straight to Meridian and go along the story at this point, it's advised that yous spend some fourth dimension exploring the region in lodge to increase Aloy's level and upgrade her skills before progressing.
At Daytower, make certain to speak with Balahn and Zaid to accelerate A Daughter'due south Vengeance and I suggest completing the following before heading to Summit:
- Side Quests - Decease from the Skies, Heap of Trouble, Acquired Taste, A Daughter's Vengeance, and Claret on Stone
- Errands - In Foreign Lands and To Old Acquaintance
Activities
- Tallneck: Sun-Steps & Tallneck: Copper Deeps
- Bandit Military camp: Gatelands
- Greatrun Hunting Grounds & Dominicus Furrows Hunting Grounds
- Cauldron ZETA & Cauldron RHO
Collectibles:
- Vantage Points - Eagle Canyon
- Metal Flowers - Marking 2 (A), Mark II (C), Marker Ii (East), Marking Ii (F), Marking 2 (K), Mark II (H), Marking Iii (J)
- Ancient Vessels - Odyssey
- Banuk Figures - Mother
The City of the Sunday
Unlock: Subsequently completing A Seeker at the Gates, Office two
Brand your fashion to Top and approach the checkpoint for a scene to acquire virtually a crackdown after Erend's sister, Ersa, and a grouping of vanguards were ambush by the Shadow Carja. The baby-sit won't let Aloy pass, and uses some choice words, simply luckily Erend arrives only in time to talk over the recent events.
Follow Erend through Superlative's street, passing some protesters, until you reach Olin's home so use Aloy's Focus to scan the carpet in the corner of the room to notice a hidden hatch. After the scene, caput upstairs and climb the ladder to a pallet of stacked ingots and then push it off the edge to bust through the flooring below. Head back downstairs and enter the hatch to Olin'due south hush-hush workshop and scan the room to find the Hologram Datapoint - A Message For Olin [02/22], a map, and Scanned Glyph - Olin's Journal [12/18]. You tin now speak with Erend to provide evidence of Olin's betrayal - Erend volition also enquire Aloy to investigate what happened to Ersa at Cerise Ridge Pass.
Optional Exploration
In Peak, yous'll be able to outset a number of quests and access to the Hunter'south Lodge, if you lot've been completing the Hunting Grounds, to advance the Hunting for the Lodge quest. This is a good fourth dimension to explore the lower one-half of the Carja Sundom, known every bit The Jewel:
- Side Quests - Honour the Fallen, Robbing the Rich, Weapons of the Lodge, Fatal Inheritance, Sunstone Rock, and Lord's day and Shadow
- Errands - Hammer and Steel, Demand and Supply, Hunting for the Lodge, Hunters' Blind, A Curious Proposal, and Lord's day'southward Judgement
Activities
- Tallneck: Spearshafts
- Bandit Army camp: Blackwing Snag
- Spurflints Hunting Grounds
- Cauldron XI
Collectibles:
- Vantage Points - Monument Valley
- Metal Flowers - Mark Two (J), Marking III (A), Mark III (B), Mark III (D), Mark III (E), Mark III (F), Mark III (M), Marker III (I)
- Ancient Vessels - Faro
- Banuk Figures - I Cannot Confess

All Outfits Horizon Zero Dawn,
Source: https://gamefaqs.gamespot.com/ps4/168644-horizon-zero-dawn/faqs/74624
Posted by: martineaumearronsid.blogspot.com
0 Response to "All Outfits Horizon Zero Dawn"
Post a Comment